Microsoft AZ-400 Designing and Implementing Microsoft DevOps Solutions Exam Practice Test

Page: 1 / 14
Total 510 questions
Question 1

SIMULATION

Task 1

Navigate to https://dev.azure.com, select Start Free, and specify the following credentials:

* UserUsefl-42147509@ExamUsers.com

* Password: eWrSalD2!

Use the default setting to sign up for Azure DevOps and create an Azure DevOps organization. Once the organization is created. creates private project named Project1.

You need to add an external user that has an email address of Usfrr2-42147S09@ExamUsers.com as a stakeholder of the User1 -42147509 Azure DevOps organization.

The user must be added to the most restrictive Azure DevOps group.

To complete this task, sign in to the Azure DevOps portal as Userl-42147509ExamUsers.com.


Answer : A

Step 1: Sign Up for Azure DevOps

Navigate to Azure DevOps.

Click onStart Free.

Enter the credentials:

Email: UserUsefl-42147509@ExamUsers.com

Password: eWrSalD2!

Follow the prompts to complete the sign-up process using the default settings.

Step 2: Create an Azure DevOps Organization

Once signed in, you will be prompted to create a new organization.

Enter a name for your organization and select your region.

Click onContinueto create the organization.

Step 3: Create a Private Project

In your new organization, click onNew Project.

Name the projectProject1.

Set the visibility toPrivate.

Click onCreate.

Step 4: Add an External User as a Stakeholder

Go to theOrganization Settings.

UnderGeneral, selectUsers.

Click onAdd users.

Enter the email address: Usfrr2-42147S09@ExamUsers.com.

Set the access level toStakeholder.

Add the user to the most restrictive group, which is typically theReadersgroup.

Click onAddto complete the process.

Step 5: Verify the User Addition

Ensure that the external user has been added successfully by checking theUserslist.

Confirm that the user has theStakeholderaccess level and is part of theReadersgroup.

By following these steps, you should be able to complete the task successfully. If you encounter any issues, feel free to ask for further assistance!


Question 2

SIMULATION

Task 8

You need to ensure that the https://contoso.com/statushook webhook is called every time a repository named az40038443478acr 1 receives a new version of an image named dotnetapp


Answer : A

To ensure that the webhook at https://contoso.com/statushook is called every time the repository named az40038443478acr1 receives a new version of an image named dotnetapp, you can follow these steps to configure a webhook in Azure Container Registry:

Navigate to the Azure Container Registry:

Go to the Azure Portal.

Find and select your Azure Container Registry instance az40038443478acr1.

Create a New Webhook:

Under Services, select Webhooks.

Click on + Add to create a new webhook.

Fill in the form with the following information:

Webhook name: Enter a unique name for your webhook.

Service URI: Enter https://contoso.com/statushook.

Custom headers: (Optional) Add any headers you want to pass along with the POST request.

Trigger actions: Select Push to trigger the webhook on image push events.

Scope: Specify the scope as az40038443478acr1:dotnetapp to target the specific image.

Status: Set to Enabled.

Save the Webhook Configuration:

Review the information and click Create to save the webhook.

Once configured, the webhook will send a POST request to https://contoso.com/statushook whenever a new version of the dotnetapp image is pushed to the az40038443478acr1 repository in your Azure Container Registry1.

This setup will automate the notification process, ensuring that the specified webhook is called with each new image version, thus fulfilling the task requirements.


Question 3

SIMULATION

Task 7

You need to prepare a network security group (NSG) named az400 38443478 nsgl to host an Azure DevOps pipeline agent. The solution must allow only the required outbound port for Azure DevOps and deny all other inbound and outbound access to the Internet


Answer : A

To prepare a Network Security Group (NSG) named az400-38443478-nsg1 for hosting an Azure DevOps pipeline agent, while allowing only the required outbound port for Azure DevOps and denying all other inbound and outbound access to the Internet, follow these steps:

Create the NSG:

Navigate to the Azure Portal.

Go to Network Security Groups and click on + Create.

Fill in the details, including the name az400-38443478-nsg1, and create the NSG.

Configure Outbound Security Rules:

Once the NSG is created, go to its settings.

Navigate to Outbound security rules.

Click on + Add to create a new rule.

Set the Destination port ranges to 443, which is the required port for Azure DevOps12.

Set the Protocol to TCP.

Set the Action to Allow.

Assign a Priority number (e.g., 100) that does not conflict with existing rules.

Provide a meaningful Name for the rule (e.g., AllowAzureDevOps).

Configure Default Rules to Deny All Other Traffic:

In the same Outbound security rules section, edit the default rule to deny all traffic.

Change the Action to Deny for the rule with the lowest priority (highest number).

Ensure that this rule applies to all protocols, source and destination IP ranges, and port ranges.

Associate the NSG with the Appropriate Resource:

Associate the NSG with the subnet or network interface of the virtual machine or resource where the Azure DevOps pipeline agent will be hosted.

By following these steps, you will ensure that the Azure DevOps pipeline agent can communicate with Azure DevOps services over the required port while blocking all other inbound and outbound Internet access, adhering to the principle of least privilege and security best practices.


Question 4

SIMULATION

Task 6

You have an Azure function hosted in an App Service plan named az400-38443478-funct

You need to configure az400 38443478-funcl lo update the functions automatically whenever new code is committed to the main branch of https://githubcom/Azure-Samples/functions-quickstart.

NOTE: Access to GitHub is blocked in the exam environment. Access to GitHub is NOT required to complete the task successfully.


Answer : A

To configure your Azure Function az400-38443478-funct to automatically update whenever new code is committed to the main branch of the specified GitHub repository, you can use GitHub Actions for continuous deployment. Here's how to set it up:

Create a GitHub Actions Workflow:

In your GitHub repository, navigate to the .github/workflows/ directory.

Create a new file for your workflow (e.g., azure-function-cd.yml).

Define the Workflow:

In the workflow file, define the steps for the build and deployment process.

Use the Azure/functions-action to deploy to your Azure Function App.

Set up triggers for the main branch to initiate the workflow on every commit.

Generate Deployment Credentials:

In the Azure Portal, navigate to your Function App az400-38443478-funct.

Download the publish profile from the Overview section by clicking on Get publish profile.

Store the Publish Profile as a GitHub Secret:

In your GitHub repository, go to Settings > Secrets and variables > Actions.

Create a new secret (e.g., AZURE_FUNCTIONAPP_PUBLISH_PROFILE) and paste the content of the publish profile.

Configure the Workflow to Use the Secret:

In the workflow file, reference the secret to authenticate the deployment to Azure.

Here's a sample GitHub Actions workflow snippet:

name: Deploy Azure Function

on:

push:

branches:

- main

jobs:

build-and-deploy:

runs-on: ubuntu-latest

steps:

- uses: actions/checkout@v2

- name: Set up Python version

uses: actions/setup-python@v2

with:

python-version: '3.x'

- name: Install dependencies

run: |

pip install -r requirements.txt

- name: Deploy to Azure Functions

uses: Azure/functions-action@v1

with:

app-name: az400-38443478-funct

publish-profile: ${{ secrets.AZURE_FUNCTIONAPP_PUBLISH_PROFILE }}

package: .

Replace the app-name with the name of your Azure Function App and ensure the Python version and dependencies match your application's requirements.

By following these steps, your Azure Function will automatically update whenever new code is pushed to the main branch of the GitHub repository. This setup minimizes manual effort and ensures that your function app is always running the latest code.


Question 5

SIMULATION

Task 5

You plan to stoic signed images in an Azure Container Registry instance named az40038443478act1.

You need to modify the SKU for az40038443478aa1 to support the planned images. The solution must minimize costs.


Answer : A

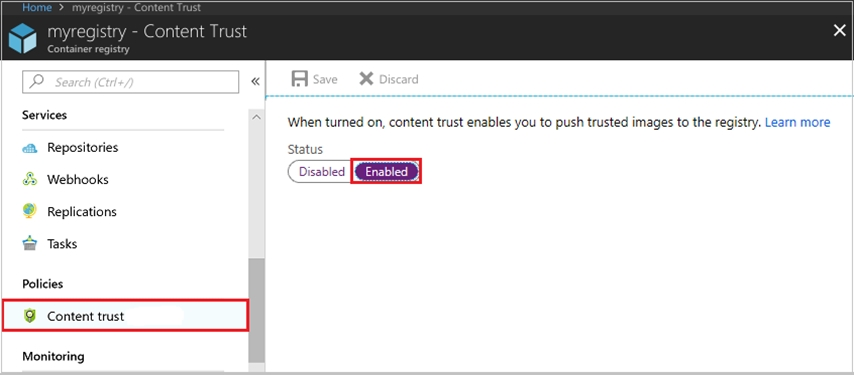
To store signed images in an Azure Container Registry (ACR) instance and support your planned images while minimizing costs, you need to modify the SKU of your ACR instance to one that supports content trust and image signing. Here's how you can do it:

Determine the Appropriate SKU:

Content trust and image signing are features of the Premium service tier of Azure Container Registry1.

If cost minimization is a priority, ensure that the Premium tier is necessary for your use case. If you require content trust, the Premium tier is the appropriate choice.

Modify the SKU of the ACR Instance:

Navigate to the Azure Portal.

Go to your ACR instance az40038443478act1.

Select Update from the overview pane.

Choose the Premium SKU from the SKU drop-down menu2.

Review the changes and pricing, then save the configuration.

By upgrading to the Premium SKU, you'll be able to store signed images in your ACR instance. Remember to monitor your usage and costs to ensure they align with your budget and requirements.


Question 6

You have a project in Azure DevOps that uses an Azure Boards board and stores code in a GitHub repository. The repository contains a file named README.md.

You need to ensure that README.md includes the status of the work items on the board. The solution must minimize administrative effort.

What should you do first?


Answer : D


Question 7

You need to use an Azure Pipelines pipeline to build and test an app and test the database of the app. The solution must meet the following requirements.

* The test stages must be run in parallel.

* The Publish_Test_Results stage must always be run.

* The test stages must be run after successful completion of the build stage.

* The Publish_Test_Results stage must be run after completion of all the test stages

Solution: You include the following elements in the YAML definition of the pipeline.

Does this meet the goal?


Answer : B


Page:    1 / 14   
Total 510 questions